Summary of project
Earlier this year we discovered the roof of our house was in very poor condition and we had no choice but to re-tile the whole thing. This resulted in some left over materials, which we decided to recycle into something for wildlife.
Often referred to as Bug Hotels, we are instead calling ours a Wildlife Hotel as the aim is to try and house a variety of wildlife, not simply creepy crawlies. This initial project focuses on building the main structure. As you will see the structure is of reasonable size and this should allow us to be flexible and add additional features / decorations as opportunities arise in the future.
This is what we did and how we did it
The main materials we had at our disposal were;
Two wooden pallets, old roof tiles, new surplus roof tiles, plywood and battens. And along with some old concrete blocks and paving slabs we had lying about, we came up with a simple multi-level design. The following is a step by step account of how we constructed the hotel. We didn’t spend ages planning this, we just had a basic idea and ran with it.
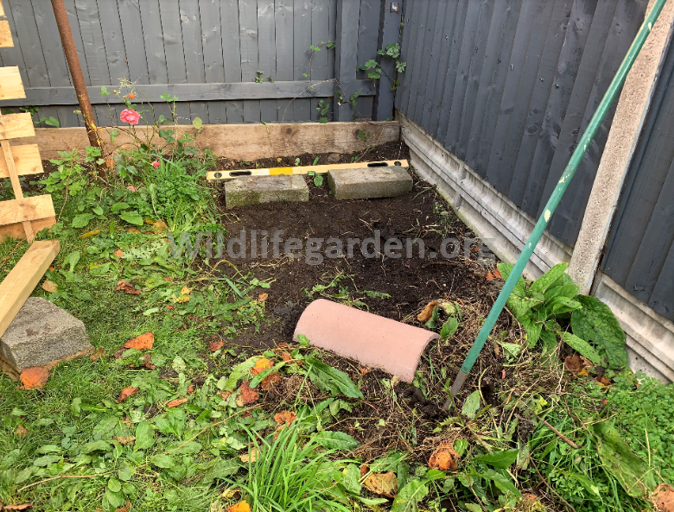
- Location: One thing to consider carefully is location, you will want at least some of the surface area in a sunny position. We decided to place the hotel, which would be rectangular in shape, in the north east corner of the garden, allowing one long side to have a south facing aspect away from the shadow of the house. The other long edge will be permanently shaded.
- The next step was to clear the ground vegetation, thankfully this only meant losing a few docks, green alkanet, cleavers, bittercress and herb Robert. We then had to level and compact the ground (a bit) before placing the concrete blocks and slabs, which would form the foundation for the structure.
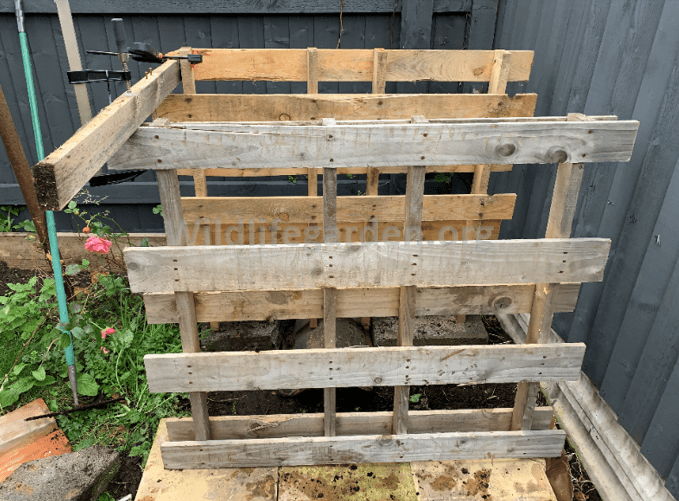
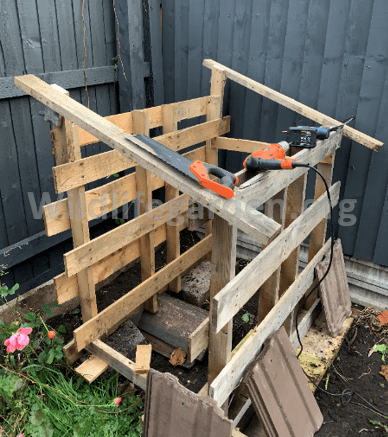
3. When using pallets most people stack them horizontally (there are some amazing examples of this online), but as we only had two this would have resulted in a very short structure. Instead we decided to stand the pallets up. However as both pallets were the same size, then in order to ensure the roof of the hotel would be slanted, we had to ensure the back one was raised higher than the front. So as shown below, the back pallet is raised on concrete blocks. The front pallet will be settled on much lower paving slabs.
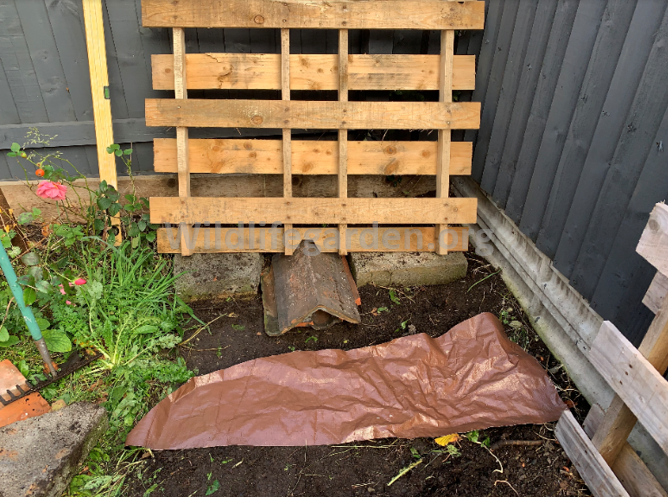
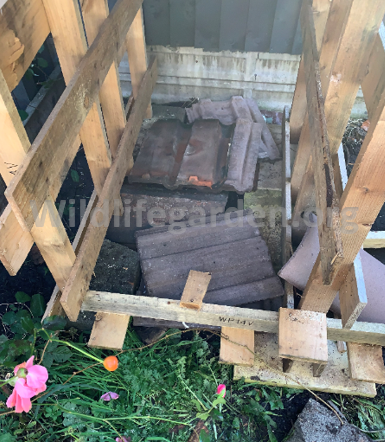
Note the triangular ridge tile on the ground, this will create a small entrance into what we are considering the basement of the Hotel from the rear of the structure. In here will be placed broken old tiles, which we hope frogs and toads and a suite of other damp / dark loving critters will find refuge. The small piece of pond liner will have patio slabs on it to prevent weeds coming through the gaps (well that’s the idea).
4. The next step is to get the slabs in place and the second pallet erected and fixed (clamped at first) to the first pallet to give the overall dimensions of the structure. Note the front is lower than the back as planned.
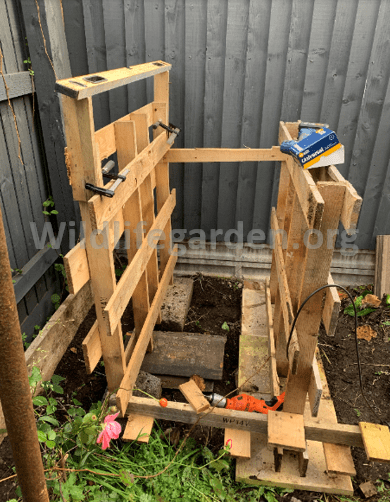
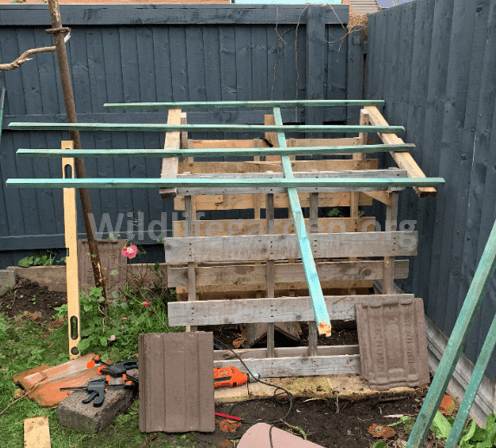
5. We quickly decided the height difference between the pallets was not enough for the angle of roof we would need in order to create a loft level in the hotel roof (see below). Therefore we raised the height (top left of image below) with short sections of wood, cut to the angle of the slope needed for the roof. Note we fixed the pallets together at this point using two pieces of wood.
6. Rafters were added with suitable overhangs at the front and rear to ensure the tiles would keep the bulk of any rain off the structure.
7. Battens were then added, note the central batten added to act as an additional rafter to provide more strength, as the tiles turned out to be heavier than we thought.
By now it was beginning to get dark. So we added a few tiles to give us an impression of what it may all look like and decided at the end of the day we would leave some of the excess baton protruding from the left hand side of the Hotel to act as a open roofed area (we just thought it might look nice).
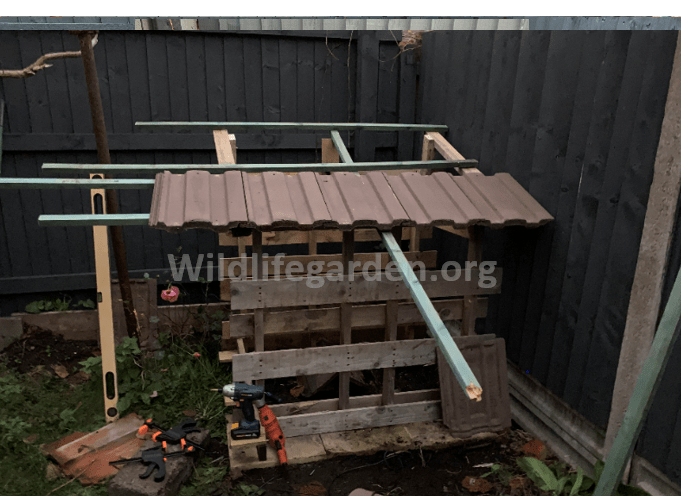
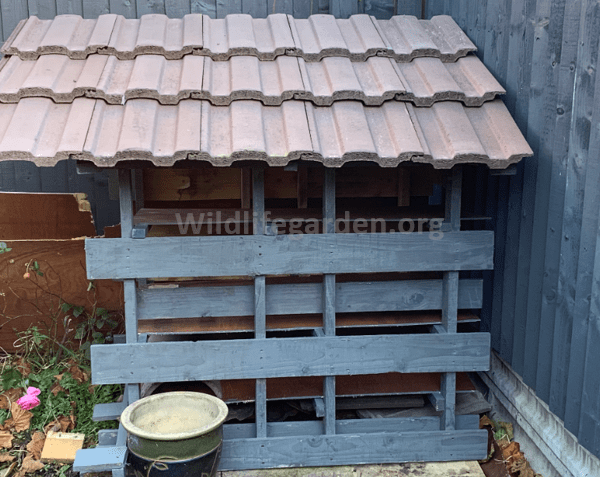
8. Up nice and early the next day to make a good start on finishing the basic structure. The roof was finished very quickly with the battens cut to final size.
9. The basement amphibian area was filled with old tiles, arranged to graduate into each other, creating narrower and narrower spaces in which things could crawl and feel safe.
10. Three additional floors were created using old plywood as well as a loft area, supported by battens. The three floors will be filled with the usual things seen in such hotels. The loft area isn’t finished. We like the idea of making this suitable for nesting birds but we need to think carefully about this as there are lots of cats / rats in the neighbourhood. So we will need to make the whole thing more predator proof and safe to enter / exit. Ultimately we may decided to drop this idea.

The floors are not fixed in place and can be removed if they need any work. The plywood is thin so it’s not clear how long it will last, but we hope being covered it should be ok for a few years. We felt it especially important that the bottom floor was removable as we are conscious that rats may become an issue.
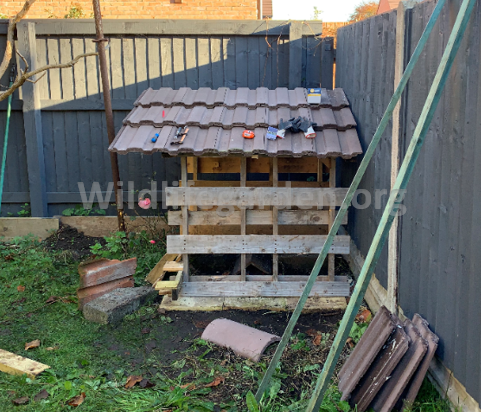
And here’s the finished basic structure. Ready for filling with canes, logs, pine cones, leaves etc. We are conscious that some of the wood was treated, in particular the battens and plywood. We also made the decision to treat the external wood with fence paint. Obviously wood preservatives are designed to be bad for fungi, insects etc, however we decided that recycling the materials we had and prolonging their life was the better option than buying new untreated wood and allowing it to slowly rot.
DC 02/12/2021
