Summary of project
To create an additional, albeit very small, garden wildlife pond with the addition of an experimental wetland (soggy mud) area. The aim is to entice new wildlife to the garden, to seed the wet area with plants from the local wetland nature reserve. Record the succession that takes place (what wildlife arrives of its own accord and how long it took to arrive). Finally the presence of the new pond will act as a refuge for any wildlife I displace when de-silting our other wildlife pond, a much needed project for later in the Autumn.
This is what we did and how we did it
First off, location (see ‘our garden map’ article). We had several options but decided in the end to site Puddle Pond (as we have dubbed it) adjacent to the retaining wall. This puts the pond on an area of the garden that gently slopes, something our design used to its advantage. The scribble-gram (I invented that word, patent pending!) below shows how we envisaged this working.
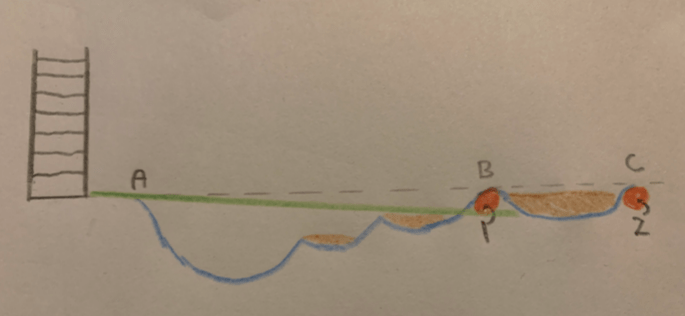
On the left is the small retaining wall. The green line represents the current slope of the grass lawn. The hatched line represents the true level line. The blue line represents the final position of the pond liner. The red dots represent two bungs or mounds created that circle the pond / wetland area. Number 1 bung at position B marks the edge of the true pond, number 2 bung at position C marks the edge of the wetland area. The brown splodges represent soil medium. See photograph below…

As per the diagram above, point A marks the highest point of the pond and point B the top of the 1st bung/mound that marks the edge of the true pond area. The idea being we could easily adjust the height of the bung by adding or removing soil to ensure the pond was completely level and I must say this worked a treat once compacted slightly. Once we checked the level of the bung all the way around we could add the liner safe in the knowledge that the pond would be true…
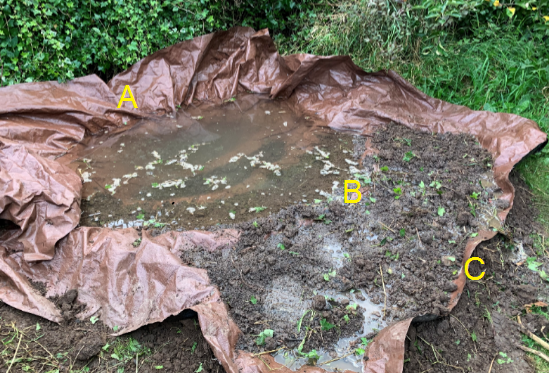
…and sure enough as the photograph above shows the pond was installed totally level between points A and B. In the photograph you can now also see we did the same for the second bung/mound around what would be the wetland area (bung 2 / location C).
This in effect created the system we wanted…almost! Obviously during wet periods of the year or during summer down pours we need water from the pond to filter into the wetland area. The only thing preventing this is the easily manipulated bung 1 at location B. So all we need do, once the pond was full was to make small indents into the bung to allow a limited amount of water connectivity between pond and wetland area.
And that was about it… but a few other tips. Firstly you may have noticed there are two shelves within the pond area. As the diagram above shows these shelves were cut/channelled to ensure the soil was retained/cupped in place and the photograph below hopefully shows this…
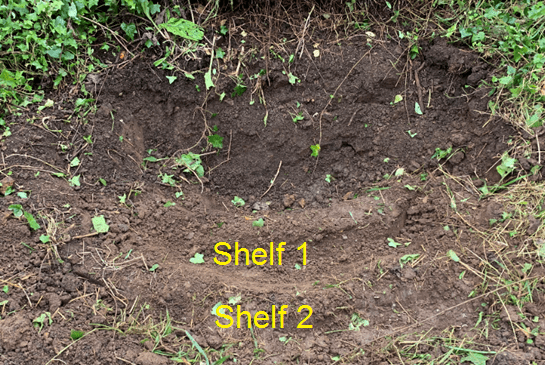
What you don’t want to do in the pond area is add the soil medium to the shelves once the pond is full, this would make a right mess. Better to pause filling the pond at the point just before each shelf, fill with earth before turning the hose back on. There is another more vital reason to do this as well. As the pond fills with water it will pull the pond liner down into every nock and cranny in the original hole that you dug. If you put the soil in the shelf before adding the water, the liner is likely to be pull downwards as you add the water and drag any soil with it. To be honest, this isn’t such an issue with small puddle ponds like this, but if you are creating something larger, then pull on the liner is something you need to consider at ever juncture.
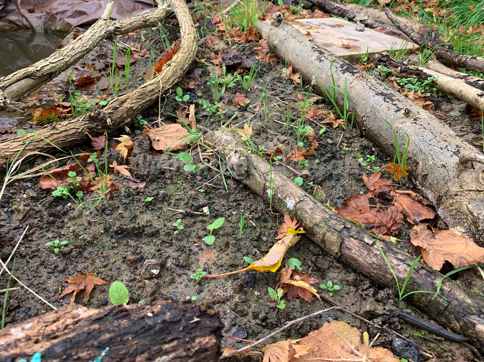
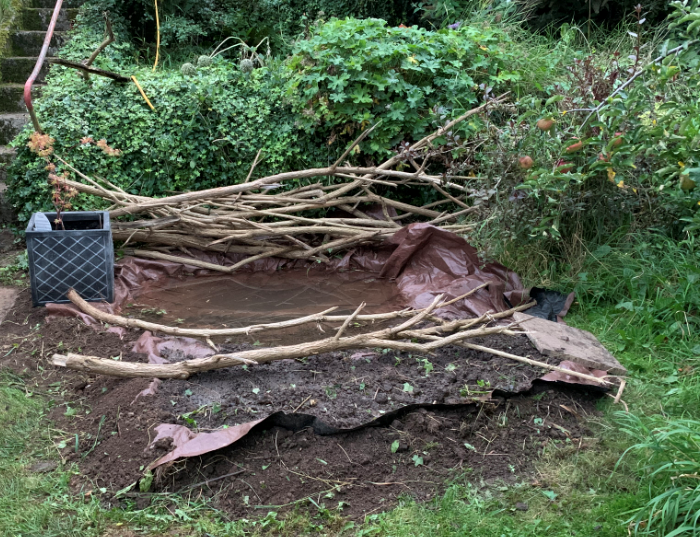
And here is the final product, once I’d mucked about with some old dead branches. Anyone who has done this before will know it looks a complete mess now, but this time next year….it should be amazing!
Further information / thoughts
This project took less than three hours to get to the stage shown above. There is admittedly still some tidying up to do and I do need to get more earth/rocks/logs to hide the exposed liner.
On this occasion it cost me nothing. The liner was left over from a fish pond project in 2017 and as this pond is L-shaped there was always going to be some large spare off cuts, especially as I ordered way to much as well. These sorts of liners come with a brown and black side. On both my other ponds I have used the black side up, but this time we decided to opt for the brown. I wonder in the short term if this will speed up evaporation (or perhaps slow it down). I’ll have no way of measuring this but someone might know if it makes a difference.
Why didn’t I line the hole first, before putting down the pond liner itself? This is a fair point. Both my other ponds are lined. However on this occasion I didn’t have any old carpet or other suitable marerial and the soil is basically clay beneath with few rocks. I simply took the risk not to, the liner is very tough.
Why didn’t I place soil in deepest part of the pond? This was my preference really, but the deepest part of the pond isn’t very deep. I imagine within a few years emergent vegetation will be coming through here as well. I want to keep this area as open water for as long as possible for amphibians to use.
Will the bungs hold? I imagine the one between the pond and the wetland will be fine. The one outside I think will be alright once it greens up a little and is held firm with roots. Both were compacted fairly tight in the end so they should keep their shape but if they don’t then I can reasonably easily fix the issue. Next time I may use bricks.
Should I have dug it deeper, wont it silt up within a few years? That’s a possibility and not one I’m worried about. It will be interesting to record how the pond develops in all respects. As noted in the opening summary I intend to see what species arrive as and when I see them and I think I will add this information below for completeness.
November 20th 2021 update
You may have noted on our garden information page details of the recent flooding we have witness and that we feel it likely polluted water has entered the small pond and wetland area.
We had a little free time this weekend so we decided to put some of the pond water under the microscope to see what we could find. Unfortunately nothing much showed up apart from a few mosquito larvae as shown below. This lack of pond life may of course have nothing to do with the flooding, but it was nonetheless disappointing. Fingers crossed we see more in the future.

Around the wetland edge, plants have been establishing themselves gradually, with the following vanguard of species taking the lead;
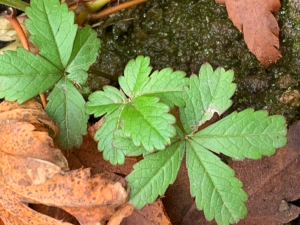
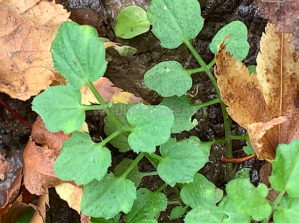
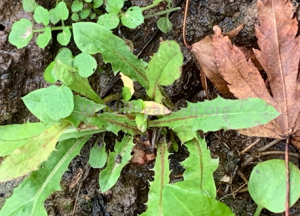
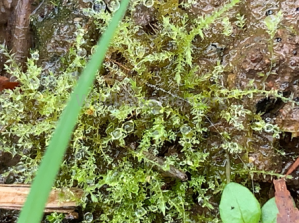
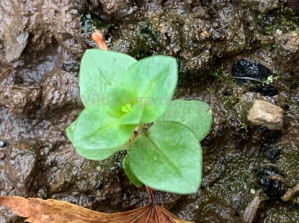
This last species we will attempt to confirm once its grown on a little. It would be fantastic if this was Purple Loosestrife, although this is a very common plant around these parts and I think it has grown in the garden before now. A few grasses are starting to form in the wetland area and we have added some old rotting logs, see below. All in all its starting to come together nicely.